I've admitted defeat with regards to the fabric boxes. No matter what I do, my brain just doesn't get the instructions. I have put it aside until I stop sulking!
I have been doing a bit of work on the baby sampler. But like many cross stitch patterns, it seems to take a while to all come togeather, and enthusiasm can wane.
I seem to have lost my crafting mojo.
I need a quick, exciting (easy) project to re-ignite my interest.
Any suggestions?
Thursday, 3 March 2011

Saturday, 26 February 2011
It Takes Time
I love it when I finish a project. However, I have very limited patience, and want things done now.
I find the hardest part of craft work, is not the technical work (although I often make so many errors it's untrue!) but the fact that I have to "wait".
I currently have two projects on the go:
* Baby cross stitch sampler for my 5 month old daughter
* Fabric box (should be simple, but recent events prove otherwise)
Pictures below show *in progress* as well as what the finished articles *should* look like! Place your bets now!


I find the hardest part of craft work, is not the technical work (although I often make so many errors it's untrue!) but the fact that I have to "wait".
I currently have two projects on the go:
* Baby cross stitch sampler for my 5 month old daughter
* Fabric box (should be simple, but recent events prove otherwise)
Pictures below show *in progress* as well as what the finished articles *should* look like! Place your bets now!


Thursday, 17 February 2011
Shabby Chic Bunting
I love bunting, and thought I would have a go at making some for the smallest ones bedroom.
I used the "how to" from CrossStitcher Issue 223, minus the Christmas cross stitch needlework.
The felt and fabric came from Hobbycraft, and the ribbon came from a lovely little fabric shop in Rugby:
Mo's Fabric and Dance - 01788 540930
I wanted a distressed/shabby chic look for the bunting. Once I had hemmed the fabric triangles, I sewed them onto the backing felt about 1cm in so that a "loose" edge was left.
It was quite a simple task once up and running. And I think it looks great in her room. Please excuse the washing in the mirror, at least its not a naked reflection of me!



I used the "how to" from CrossStitcher Issue 223, minus the Christmas cross stitch needlework.
The felt and fabric came from Hobbycraft, and the ribbon came from a lovely little fabric shop in Rugby:
Mo's Fabric and Dance - 01788 540930
I wanted a distressed/shabby chic look for the bunting. Once I had hemmed the fabric triangles, I sewed them onto the backing felt about 1cm in so that a "loose" edge was left.
It was quite a simple task once up and running. And I think it looks great in her room. Please excuse the washing in the mirror, at least its not a naked reflection of me!


Laundry Day Horror
With the advent of seemingly nicer weather, I am, like many people, becoming excited at the prospect of spring.
Now, don't get me wrong, the nicer weather, lighter nights and blooming gardens are all well and good but the thing that excites me the most about spring is laundry!
The coming of spring heralds a new era once again in our household. The sheer volume of washing generated by himself and the 2 girls is astounding. Spring means the tumble dryer will be used with less frequency - Hello cheaper electricty bills - and means that I no longer need to have the clothes airer constantly erected - Hello ensuite bathroom!
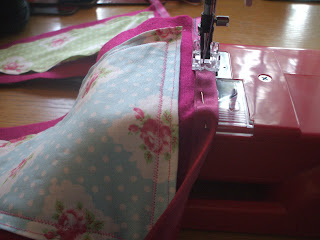
So with this in mind - and with inspiration from a very pretty design in CK "Sew" - today I have made a peg bag.
Now, before I go any further, you need to understand that sometimes I lean a tad towards arrogance. I decided, with my half a dozen projects under my belt,that I could do this without following the instructions. FAIL!
The whole thing has been a catalogue of errors. But the two main ones were:
* I made the slot too small, which then made it impossible to insert the
coat hanger. Cue, unpicking all the machine stitching, inserting coat
hanger and trying to stitch with the hanger in situ.
* Ignoring instructions to hand stitch the bias tape. Nope, I decided
to machine sew. To summarise, it went horribly wrong.
So, on reflection. This one will do for now, however, I am determined to have another go next week. Reading (and following) the instructions, and doing a proper job.

Now, don't get me wrong, the nicer weather, lighter nights and blooming gardens are all well and good but the thing that excites me the most about spring is laundry!
The coming of spring heralds a new era once again in our household. The sheer volume of washing generated by himself and the 2 girls is astounding. Spring means the tumble dryer will be used with less frequency - Hello cheaper electricty bills - and means that I no longer need to have the clothes airer constantly erected - Hello ensuite bathroom!
So with this in mind - and with inspiration from a very pretty design in CK "Sew" - today I have made a peg bag.
Now, before I go any further, you need to understand that sometimes I lean a tad towards arrogance. I decided, with my half a dozen projects under my belt,that I could do this without following the instructions. FAIL!
The whole thing has been a catalogue of errors. But the two main ones were:
* I made the slot too small, which then made it impossible to insert the
coat hanger. Cue, unpicking all the machine stitching, inserting coat
hanger and trying to stitch with the hanger in situ.
* Ignoring instructions to hand stitch the bias tape. Nope, I decided
to machine sew. To summarise, it went horribly wrong.
So, on reflection. This one will do for now, however, I am determined to have another go next week. Reading (and following) the instructions, and doing a proper job.

Wednesday, 16 February 2011
Something For The Smallest Ones
I came across a really great idea for a toy - an activity cube - that I could make for my baby daughter. This was the first item I made using my new sewing machine.
It was also a great project to use up the numerous off cuts of fabric I seem to be rapidly accumulating.
It was very simple to make and looks great when completed. I also had requests to made several more (paid commission - get me!) for friends who saw the cube.
Materials
8 x assorted fabrics (14 x 14 cm)
Bondaweb (for applique "surprise" behind door)
Wadding (batting) for the door
Filling (batting) to stuff the cube
Beads in a container buried in the middle of the cube to make it rattle.
Velcro
Time Taken
Approx 3 hours
This was a really good project for the 1st attempt at using a sewing machine. Hand stitching would have taken hours. I only had to hand stitch (over sew) one side of the cube and also the applique "surprise" heart.
Things I have learnt
When sewing items "inside out", bear in mind placement of any external attachments. I had to unpick my velcro loop twice as I had sewn it as if I had been sewing with the cube the right side out !
10.01.11
Below are a selection of photos showing cubes in construction and completed.


It was also a great project to use up the numerous off cuts of fabric I seem to be rapidly accumulating.
It was very simple to make and looks great when completed. I also had requests to made several more (paid commission - get me!) for friends who saw the cube.
Materials
8 x assorted fabrics (14 x 14 cm)
Bondaweb (for applique "surprise" behind door)
Wadding (batting) for the door
Filling (batting) to stuff the cube
Beads in a container buried in the middle of the cube to make it rattle.
Velcro
Time Taken
Approx 3 hours
This was a really good project for the 1st attempt at using a sewing machine. Hand stitching would have taken hours. I only had to hand stitch (over sew) one side of the cube and also the applique "surprise" heart.
Things I have learnt
When sewing items "inside out", bear in mind placement of any external attachments. I had to unpick my velcro loop twice as I had sewn it as if I had been sewing with the cube the right side out !
10.01.11
Below are a selection of photos showing cubes in construction and completed.


New Love Comes Cheap
Having only recently taken up sewing and needlework I had to start from scratch regarding materials and equipment. I took me about a month to realise what I really, REALLY needed was a sewing machine.
The world of the sewing machine is a scary place for novices. I looked at many makes and models, from the cheap and cheerful to the expensive all singing all dancing models. I tied myself in knots trying to decide which one would suit me best.
In the end, I abdicated all responsibilty, advised the other half that I would really like a machine for Christmas, and left it to fate! I am pleased to say, he came up trumps.
Come Christmas morning, I was the proud owner of a very basic, cheap "beginners" machine from John Lewis. And I fell in love!
My machine is a godsend. I had it up and running and was practising some, albeit very wobbly, sewing in less than an hour.
For a first sewing machine, it is absolutley ideal. All the tasks, from winding the bobbin, to threading the machine, to sewing hints and tips and explained clearly and easily.
It has 10 simple stitch choices, and 9 tensions settings, what more could the novice machinist need!
I now try and choose projects so that I can use my machine, as it is such a pleasure to use.

The world of the sewing machine is a scary place for novices. I looked at many makes and models, from the cheap and cheerful to the expensive all singing all dancing models. I tied myself in knots trying to decide which one would suit me best.
In the end, I abdicated all responsibilty, advised the other half that I would really like a machine for Christmas, and left it to fate! I am pleased to say, he came up trumps.
Come Christmas morning, I was the proud owner of a very basic, cheap "beginners" machine from John Lewis. And I fell in love!
My machine is a godsend. I had it up and running and was practising some, albeit very wobbly, sewing in less than an hour.
For a first sewing machine, it is absolutley ideal. All the tasks, from winding the bobbin, to threading the machine, to sewing hints and tips and explained clearly and easily.
It has 10 simple stitch choices, and 9 tensions settings, what more could the novice machinist need!
I now try and choose projects so that I can use my machine, as it is such a pleasure to use.

Tuesday, 15 February 2011
Bags of Obsession
I'm a bit obsessed with bags at the moment. I'm not talking about Gucci, Chloe or whatever bit of arm candy Mrs Beckham is lugging around at the moment. No, I'm talking about simple, honest, home made bags.
I first got interested in bags when looking at doing a few simple applique projects. There is so much you can do with a plain tote and some scraps of material.
I do tend to cheat, and purchase my drawstring bags and plain totes from some very good eBay shops, simply because you can pick them up so cheaply. I have, so far, made one bag myself, and more will certainly follow.
Anyway, here is my collection of bags so far.


These bags were my first foray into applique. Very simple to do and they make great shopping bags. Materials/resources used:
* plain tote
* fabric scraps
* Bondaweb
* needle and thread
* iron
The bags were give to 3 lucky (unsuspecting) family members, who were obviously delighted to received these unique and one off designs.
My eldest daughter has recently started dance classes, and my youngest daughter will be starting nursery in April, so I wanted to make them a personalised pump bag each.


The materials and resources used were similar to the tote bags. Although this time, of course, I have used red drawstring bags.
The bags were quite thin, so I lined them both with red and white check gingham material .
The bag I am most proud of (at this point anyway) is one that I made just this last weekend. I used instructions from Sew Pretty Homestyle (Tone Finnanger)

I purchased the round handles, polka dot material and cream lining from eBay shops.
Although I made a couple of mistakes
*the material gathered around one of the handles is not quite flush
*having to unpick it once (machine stitch) when halfway through due to
it being "back to front"
I really enjoyed making this simple bag which only took about 2 hours. I have other material which will lend itself well to a similar project, and I will probably get all technical and try and add a couple of pockets. I'll let you know how I get on.
I first got interested in bags when looking at doing a few simple applique projects. There is so much you can do with a plain tote and some scraps of material.
I do tend to cheat, and purchase my drawstring bags and plain totes from some very good eBay shops, simply because you can pick them up so cheaply. I have, so far, made one bag myself, and more will certainly follow.
Anyway, here is my collection of bags so far.


These bags were my first foray into applique. Very simple to do and they make great shopping bags. Materials/resources used:
* plain tote
* fabric scraps
* Bondaweb
* needle and thread
* iron
The bags were give to 3 lucky (unsuspecting) family members, who were obviously delighted to received these unique and one off designs.
My eldest daughter has recently started dance classes, and my youngest daughter will be starting nursery in April, so I wanted to make them a personalised pump bag each.


The materials and resources used were similar to the tote bags. Although this time, of course, I have used red drawstring bags.
The bags were quite thin, so I lined them both with red and white check gingham material .
The bag I am most proud of (at this point anyway) is one that I made just this last weekend. I used instructions from Sew Pretty Homestyle (Tone Finnanger)

I purchased the round handles, polka dot material and cream lining from eBay shops.
Although I made a couple of mistakes
*the material gathered around one of the handles is not quite flush
*having to unpick it once (machine stitch) when halfway through due to
it being "back to front"
I really enjoyed making this simple bag which only took about 2 hours. I have other material which will lend itself well to a similar project, and I will probably get all technical and try and add a couple of pockets. I'll let you know how I get on.
Subscribe to:
Posts (Atom)